+
+
JavaScript in IoT
Jakub Jóźwiak
Agenda:

- Raspberry Pi
- AWS IoT
- Homebridge
Raspberry Pi
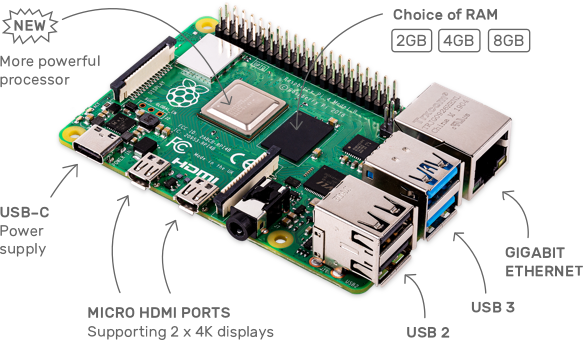
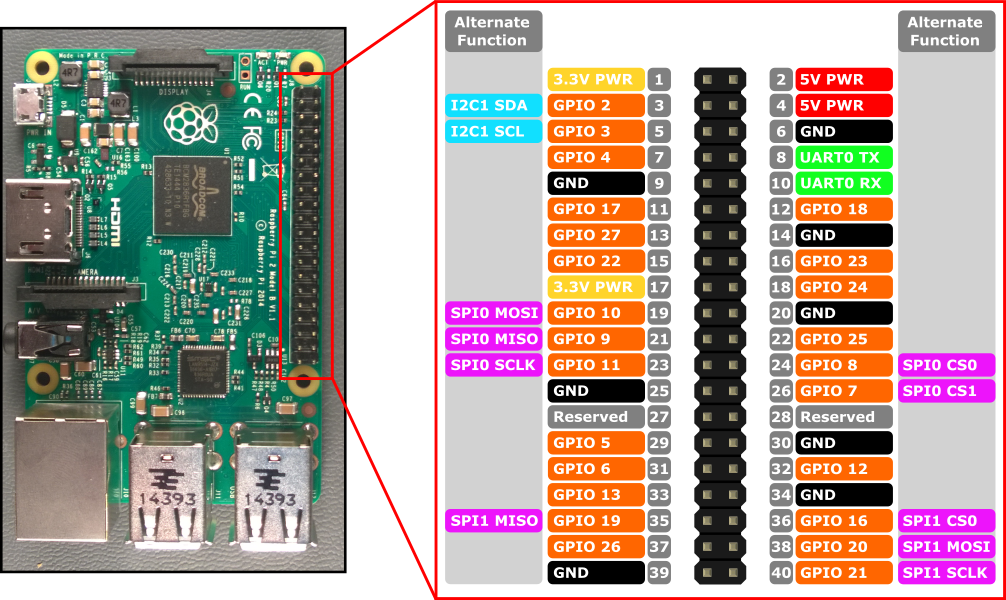
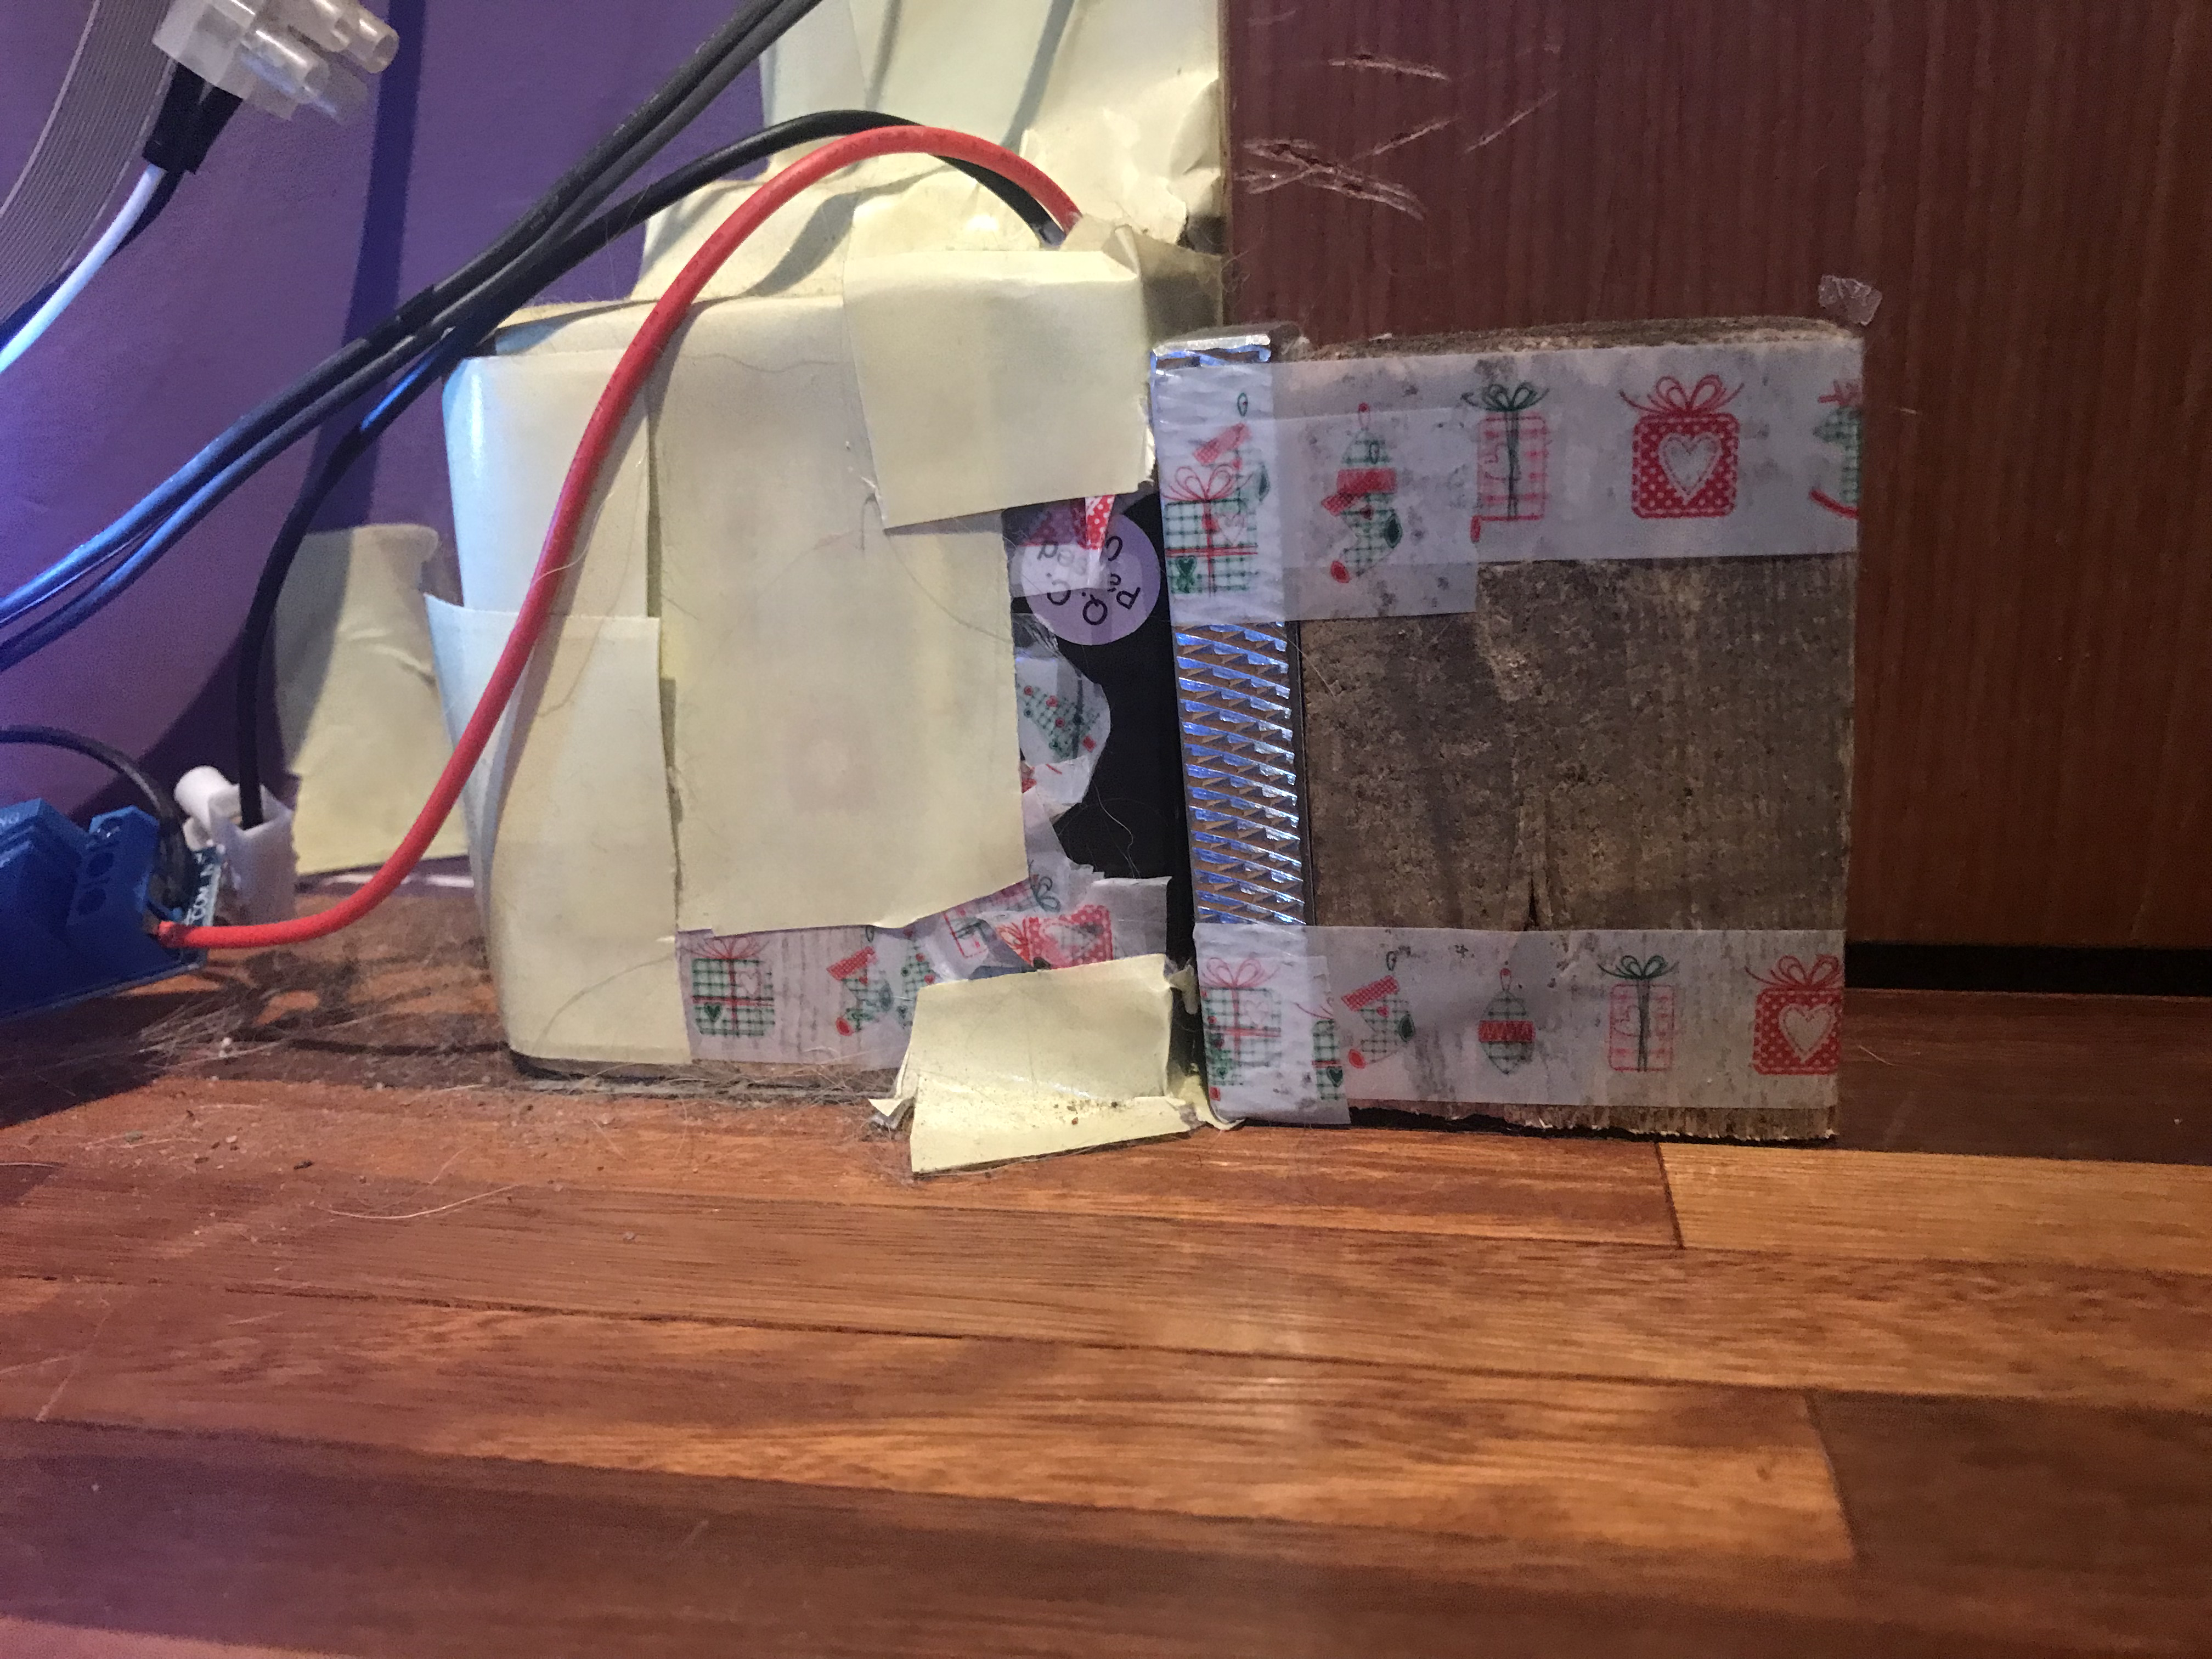
Cheap micro computer that runs Linux, but it also provides a set of GPIO pins that allow you to control electronic components.Most popular micro computers
| Micro Computer | Price (around) |
|---|---|
| Raspberry Pi 4 | ~ 190zł |
| Raspberry Pi Zero | ~ 80zł |
| Arduino | ~ 90zł |
| ESP8266 | ~ 20zł |
How it looks like
What with those GPIO?
Types of sensors/inputs
- Accelerometers
- Gesture sensors
- Fingerprint readers
- LCD/LED screens
- Temperature/Humidity sensors
- Muscle sensors
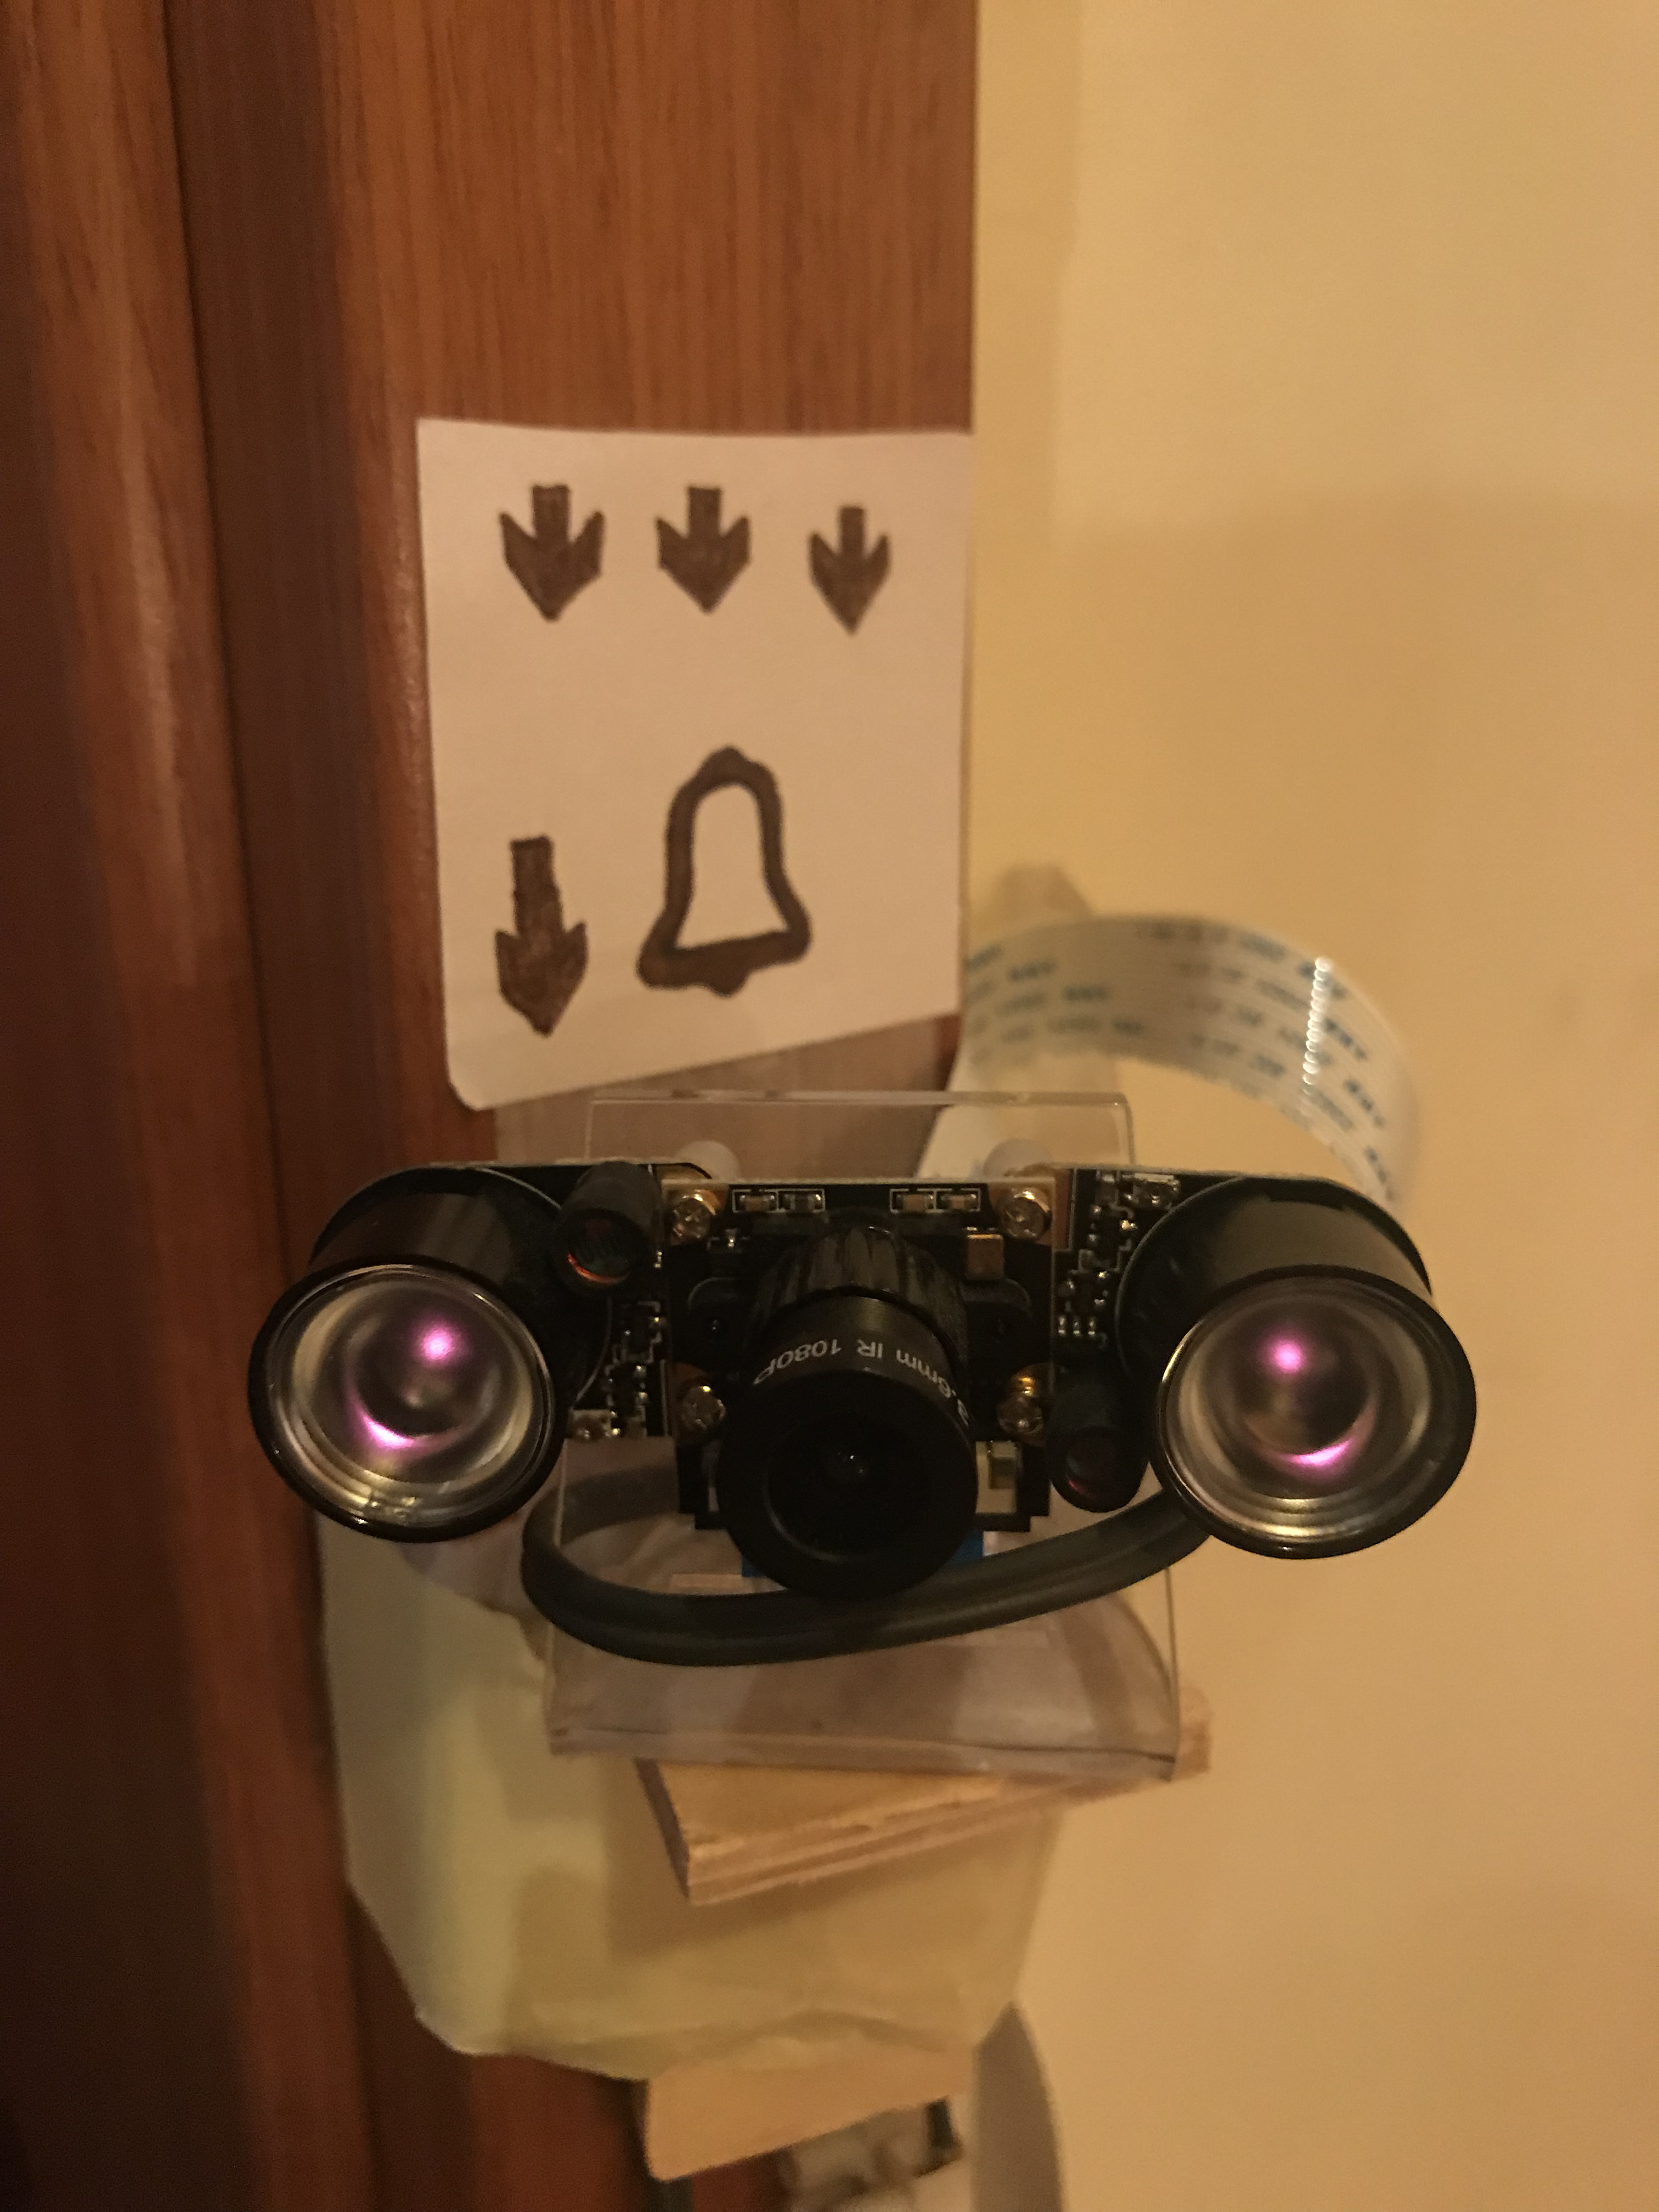
- Cameras
- Many many more...
So how to code it?
onoff library const { Gpio } = require('onoff'); const LIGHT_PIN = 21; const light = new Gpio(LIGHT_PIN, 'out'); // Turn on light light.writeSync(1); // Turn off light light.writeSync(0); const BUTTON_PIN = 2; const button = new Gpio( BUTTON_PIN, 'in', 'rising', {debounceTimeout: 10} ); button.watch(async (err, value) => { if (err) { throw err; } console.log('Button pressed!'); });
const { Gpio } = require('onoff'); const LIGHT_PIN = 21; const light = new Gpio(LIGHT_PIN, 'out'); // Turn on light light.writeSync(1); // Turn off light light.writeSync(0); const BUTTON_PIN = 2; const button = new Gpio( BUTTON_PIN, 'in', 'rising', {debounceTimeout: 10} ); button.watch(async (err, value) => { if (err) { throw err; } console.log('Button pressed!'); });
const { Gpio } = require('onoff'); const LIGHT_PIN = 21; const light = new Gpio(LIGHT_PIN, 'out'); // Turn on light light.writeSync(1); // Turn off light light.writeSync(0); const BUTTON_PIN = 2; const button = new Gpio( BUTTON_PIN, 'in', 'rising', {debounceTimeout: 10} ); button.watch(async (err, value) => { if (err) { throw err; } console.log('Button pressed!'); });
const { Gpio } = require('onoff'); const LIGHT_PIN = 21; const light = new Gpio(LIGHT_PIN, 'out'); // Turn on light light.writeSync(1); // Turn off light light.writeSync(0); const BUTTON_PIN = 2; const button = new Gpio( BUTTON_PIN, 'in', 'rising', {debounceTimeout: 10} ); button.watch(async (err, value) => { if (err) { throw err; } console.log('Button pressed!'); });
Scheduling tasks
So probably You would like to run your app automatically on system reboot or with specific time pattern.
Run in terminal:
crontab -e
And add script at the end of file:
@reboot node /home/pi/app.js &
And what can You really do with this micro-computer?
- Use as Your Desktop PC
- Security camera
- NAS
- WiFi extender
- Smart mirror
- Ambilight System for any screen
- And again many many more...
"It works for me"

AWS IoT
You know how to code Your device but how to securely connect with Your app?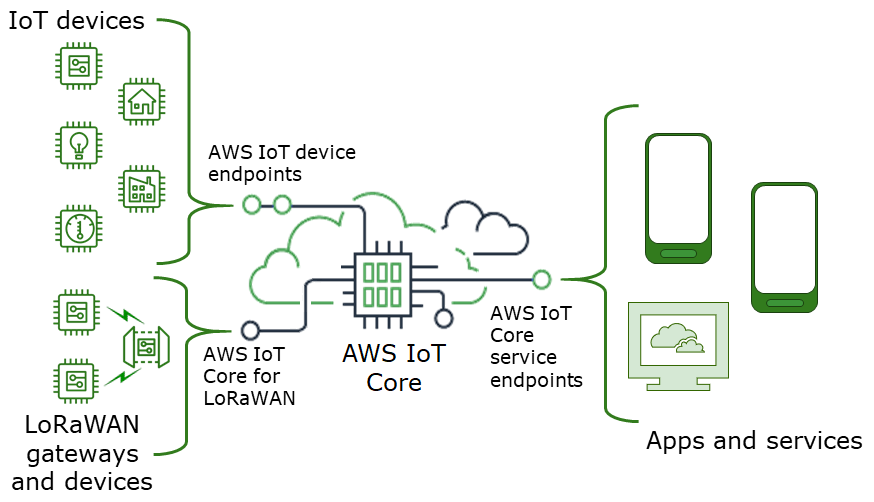
- Managing devices
- Security
- Monitoring
- Over-the-air-updates
Sounds good? Implementation is much better!
AWS IoT Device SDK JS const awsIot = require('aws-iot-device-sdk'); const device = awsIot.device({ keyPath: 'PrivateKeyPath', certPath: 'CertificatePath', caPath: 'RootCACertificatePath', clientId: 'UniqueClientIdentifier', host: 'IoTCoreEndpoint' }); device.on('connect', () => { console.log('connected'); device.publish('connected', JSON.stringify({ message: 'connected' })); device.subscribe('turnOn'); }); device.on('message', (topic) => { if (topic === 'turnOn') { console.log('Turned on'); } });
const awsIot = require('aws-iot-device-sdk'); const device = awsIot.device({ keyPath: 'PrivateKeyPath', certPath: 'CertificatePath', caPath: 'RootCACertificatePath', clientId: 'UniqueClientIdentifier', host: 'IoTCoreEndpoint' }); device.on('connect', () => { console.log('connected'); device.publish('connected', JSON.stringify({ message: 'connected' })); device.subscribe('turnOn'); }); device.on('message', (topic) => { if (topic === 'turnOn') { console.log('Turned on'); } });
const awsIot = require('aws-iot-device-sdk'); const device = awsIot.device({ keyPath: 'PrivateKeyPath', certPath: 'CertificatePath', caPath: 'RootCACertificatePath', clientId: 'UniqueClientIdentifier', host: 'IoTCoreEndpoint' }); device.on('connect', () => { console.log('connected'); device.publish('connected', JSON.stringify({ message: 'connected' })); device.subscribe('turnOn'); }); device.on('message', (topic) => { if (topic === 'turnOn') { console.log('Turned on'); } });
Homebridge
So if it comes to IoT probably mostly there is Smart Home in the background.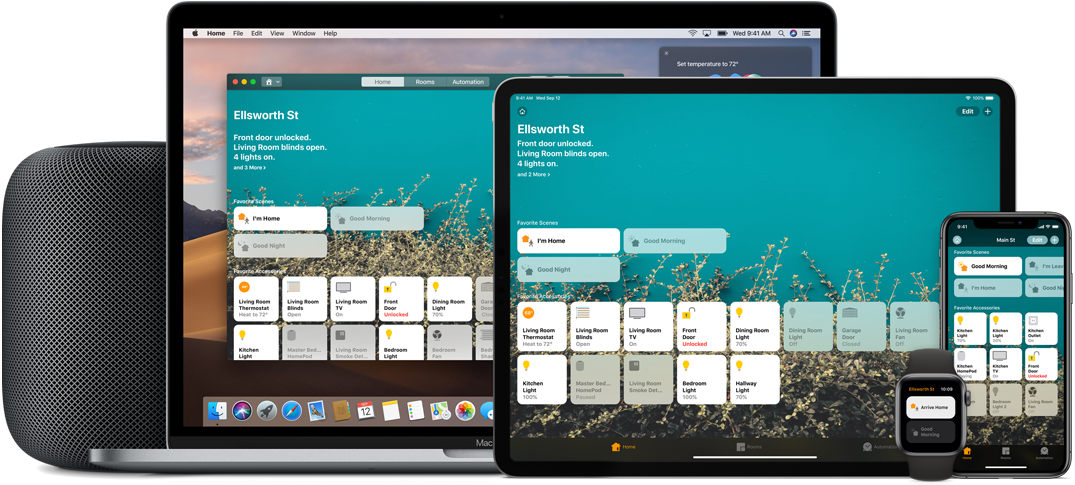
Homebridge allows you to integrate with smart home devices that do not natively support HomeKit without any costs or effort.
How to install homebridge on RPI
Install homebridge globally
sudo npm install -g --unsafe-perm homebridge homebridge-config-ui-x
Setup homebridge as a service that will start on boot
Login to the web interface by going to http://{ip address of your server}:8581.
sudo hb-service install --user homebridge
Recommended plugins for presentation context
There are over 2,000 Homebridge plugins supporting thousands of different smart
accessories.
Also you can create your own plugin!
Additional helpful sites
- Forbot blog
- Botland shop
- Nest.js MQTT microservice module
- Node-RED - Online and drag&drop service for wiring together hardware devices